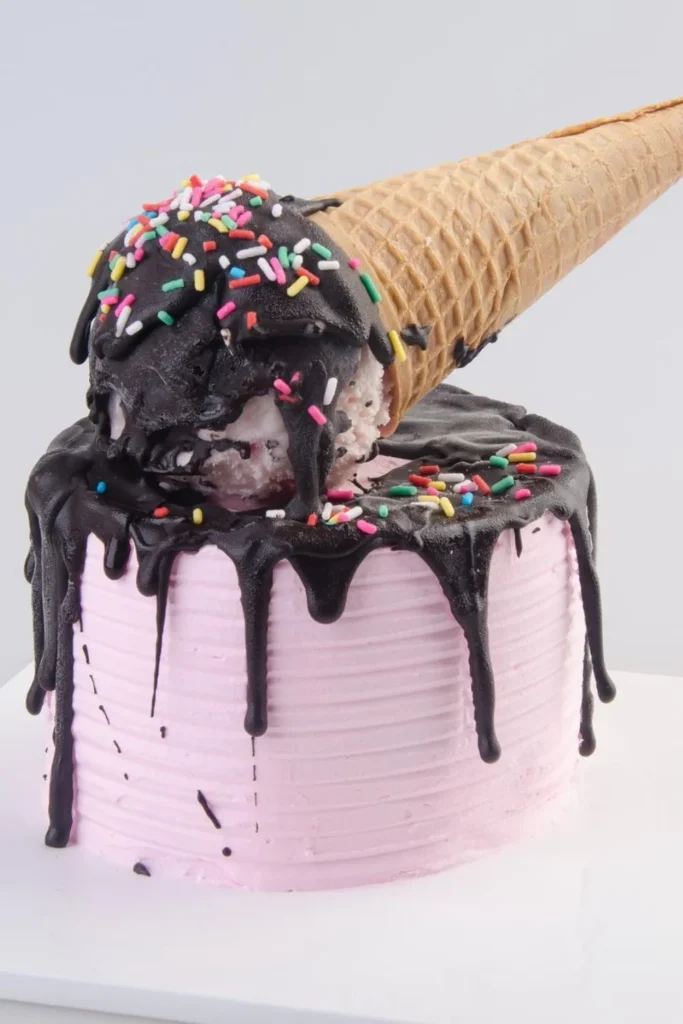
An ice cream cone cake is a fun and creative twist on traditional cake designs. It looks just like an ice cream cone but is actually made from cake. This cake is perfect for parties or celebrations, especially for kids. It combines the joy of cake and the playful look of an ice cream cone.
With colorful frosting and decorations, this cake can be customized to fit any theme. Whether it’s for a birthday or a casual get-together, it’s sure to delight anyone who sees it. Let’s take a closer look at what makes this treat so special.
Why You’ll Love Ice Cream Cone Cake
An ice cream cone cake is a fun and delicious treat that everyone will enjoy! Here are some reasons why it’s so popular and why you’ll love it too:
Unique and Fun Design
Ice cream cone cakes are shaped like ice cream cones, which makes them visually exciting. They look just like a scoop of ice cream sitting on a cone, but it’s cake instead! This playful design makes them perfect for birthdays, parties, or any celebration.
Easy to Customize
You can make an ice cream cone cake with any flavor of cake and frosting you like. You can also add sprinkles, candy, or other toppings for a personal touch. Whether you like chocolate, vanilla, or something more unique, this cake can be made to suit your taste.
Perfect for Kids and Adults
Both kids and adults love the look and taste of ice cream cone cakes. They’re sweet, fun, and easy to eat. You don’t have to worry about cutting slices of cake—just hand out a cone, and everyone has their own little treat!
Ingredients for an Ice Cream Cone Cake
Making an ice cream cone cake is fun and easy! Here’s a list of simple ingredients you’ll need to create this sweet treat.
How to Make an Ice Cream Cone Cake
- Cake Mix: Cake mix is the base of your ice cream cone cake. You can use any flavor you like, such as vanilla, chocolate, or funfetti. It’s quick and simple to make, saving you time in the kitchen. Just pick a box of your favorite cake mix from the store.
- Eggs: Eggs help bind the cake mix together and make the cake fluffy. Usually, you’ll need around 2 to 3 eggs, depending on the cake mix instructions.
- Vegetable Oil: Vegetable oil is used to keep the cake moist. It helps the cake bake evenly and gives it a soft texture. You’ll typically need around 1/4 to 1/2 cup of oil, depending on the size of your cake mix.
- Water: Water helps to mix the cake ingredients smoothly. It ensures the cake batter reaches the right consistency. Follow the instructions on the cake mix box for the right amount of water, usually about 1 to 1 1/4 cups.
- Ice Cream Cones: The ice cream cones are what make this cake special! You’ll use them as the “cups” to hold your cake batter. Choose standard-sized cones, and make sure they are sturdy enough to hold the cake batter without breaking.
- Frosting: Frosting is the fun part of decorating your ice cream cone cake. You can choose any type of frosting: buttercream, chocolate, or whipped cream. It’s best to use a thick frosting that will stay on the cone and create a nice “ice cream” look on top. You can also add sprinkles, candies, or edible glitter to make the cake even more colorful and festive.
How to Make Ice cream cone cake
Ingredients
To make your ice cream cone cakes, you’ll need the following ingredients:
- 1 box of cake mix (or homemade mix for a more personalized flavor)
- 3 large eggs
- 1/2 cup of vegetable oil
- 1 cup of water
- 12-15 flat-bottomed ice cream cones
- Frosting of choice (buttercream, chocolate, or cream cheese frosting)
- Sprinkles or other toppings (optional)
Directions
Follow these simple steps to make your ice cream cone cakes:
- Preheat Your Oven: Set your oven to 350°F (175°C).
- Prepare the Cake Batter: In a mixing bowl, combine the cake mix, eggs, oil, and water. Mix until smooth and well combined.
- Set the Cones: Place the ice cream cones upright on a baking sheet. If desired, line them with cupcake liners to avoid spills.
- Fill the Cones: Using a spoon, carefully fill each ice cream cone about halfway with cake batter. Be sure not to overfill them, as the cake will rise while baking.
- Bake: Place the baking sheet in the oven and bake for 18-20 minutes or until a toothpick inserted into the cake comes out clean.
- Cool the Cakes: Once done, remove the cones from the oven and let them cool completely on a wire rack.
- Decorate: Once cooled, top the cakes with your chosen frosting and sprinkles or toppings.
Ice Cream Cone Cake Variation
There are many ways to customize an ice cream cone cake to fit your taste and the occasion. Here are a few variations you can try:
- Different Flavors: You can use any flavor of cake batter you like. Chocolate, vanilla, strawberry, and even Funfetti are all great choices. You can even experiment with mixing flavors for a unique twist!
- Frosting Styles: While frosting is a key element in making the cake look like an ice cream cone, you can use different techniques. Try piping the frosting in swirls to create a soft-serve look or use fondant for a smooth, clean finish.
- Add Toppings: Just like an actual ice cream cone, you can add fun toppings like sprinkles, mini chocolate chips, crushed cookies, or even candy to make the cake even more exciting.
- Theme Cakes: For parties, you can decorate the ice cream cone cakes to match the theme. Use food coloring to tint the frosting and create cakes that match a rainbow, a holiday, or your favorite character.
- Cupcake Variation: If you prefer not to bake the cake inside the cone, you can bake mini cupcakes and serve them inside waffle cones, giving them an ice cream cone look without the hassle of baking in the cone.
How to Serve an Ice Cream Cone Cake
Serving ice cream cone cakes is simple and fun. Here are some tips to make the serving process even smoother:
Individual Servings: Since each cone is an individual portion, you don’t need to worry about cutting the cake into slices. This makes serving at parties or gatherings much easier.
Decorate Right Before Serving: To keep your ice cream cone cakes fresh and visually appealing, decorate them just before serving. This ensures the frosting looks fresh and the toppings stay in place.
On a Platter or Tray: Serve the cakes on a large platter or tray for an attractive presentation. Arrange them in a circle or scatter them across the tray for a fun and playful display.
Pair with Drinks: These sweet treats go great with a cold beverage, like milk, fruit punch, or lemonade. Pairing the cakes with a cold drink can make for a delicious snack at any time.
Storage Tips
If you’re not planning to serve the ice cream cone cakes right away, here’s how to store them:
Room Temperature: You can store ice cream cone cakes at room temperature for a day or two. Just make sure they are covered with plastic wrap or placed in an airtight container to keep them fresh.
Refrigeration: If you need to store the cakes for a longer time, put them in the refrigerator. However, keep in mind that frosting can sometimes firm up in the fridge. Allow them to come back to room temperature before serving for the best taste and texture.
Freezing: Ice cream cone cakes can be frozen for up to a month. Wrap each cake in plastic wrap and place it in a freezer-safe container or bag. When you’re ready to enjoy them, thaw them in the fridge or at room temperature.
FAQs About Ice Cream Cone Cake
What is an ice cream cone cake?
An ice cream cone cake is a fun dessert that looks like an ice cream cone but is actually made of cake. It combines cake, frosting, and sometimes candy or sprinkles on top of a cone.
Can I make an ice cream cone cake at home?
Yes, making an ice cream cone cake at home is simple! You just need cake mix, ice cream cones, and frosting for decoration.
How do I prevent the cake from falling out of the cone?
To keep the cake from falling out, fill the cone halfway with batter, and bake at a lower temperature. This helps the cake set and stay in place.
How do I decorate an ice cream cone cake?
Decorating is the fun part! Use frosting to cover the cake, then add sprinkles, candies, or a cherry on top for extra color and texture.
Ice Cream Cone Cake Recipe
Equipment
- Ice Cream Cones
- Mixing Bowls
- Electric Mixer
- Measuring Cups and Spoons
- Baking Sheet
- Cupcake Liners
- Frosting Tools
Ingredients
- 1 box of cake mix
- 3 eggs
- 1/2 cup of vegetable oil
- 1 cup of water
- 12-15 flat-bottomed ice cream cones
- Frosting of choice (buttercream, chocolate, or cream cheese frosting)
- Sprinkles or other toppings (optional)
Instructions
- Preheat Your Oven: Set your oven to 350°F (175°C).
- Prepare the Cake Batter: In a mixing bowl, combine the cake mix, eggs, oil, and water. Mix until smooth and well combined.
- Set the Cones: Place the ice cream cones upright on a baking sheet. If desired, line them with cupcake liners to avoid spills.
- Fill the Cones: Using a spoon, carefully fill each ice cream cone about halfway with cake batter. Be sure not to overfill them, as the cake will rise while baking.
- Bake: Place the baking sheet in the oven and bake for 18-20 minutes or until a toothpick inserted into the cake comes out clean.
- Cool the Cakes: Once done, remove the cones from the oven and let them cool completely on a wire rack.
- Decorate: Once cooled, top the cakes with your chosen frosting and sprinkles or toppings.