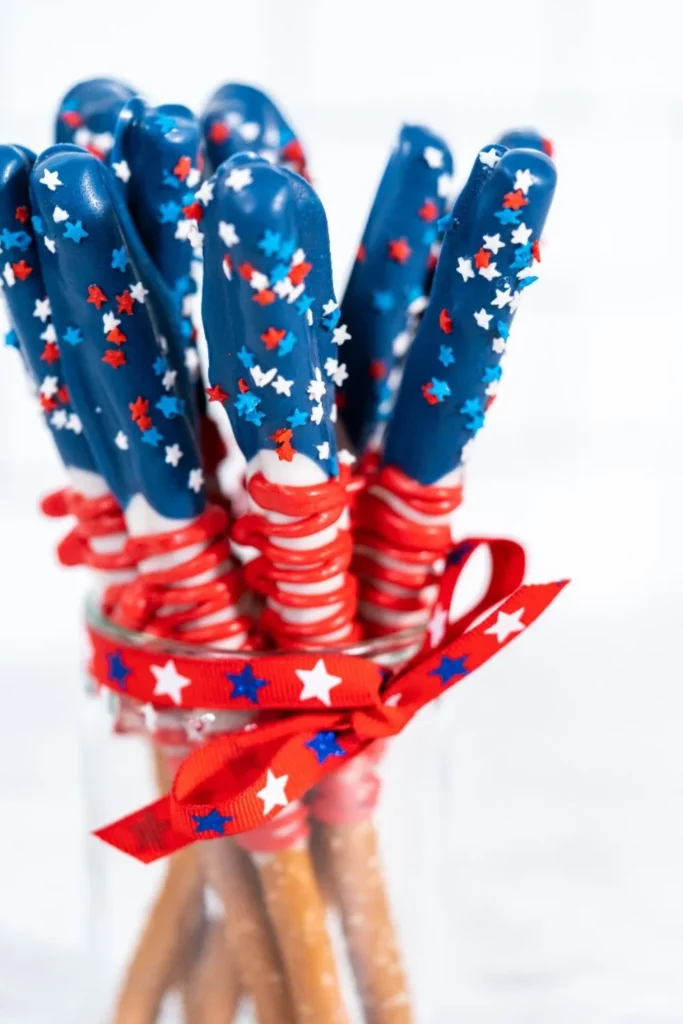
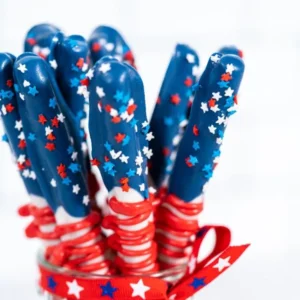
This special type of cake pop is decorated with patriotic colors and themes. Patriotic Cake Pops usually have red, white, and blue icing or sprinkles to match the American flag.
They are made by mixing cake crumbs with frosting, shaping them into small balls, and then coating them in colored chocolate or candy melts. These treats bring a festive touch to parties and celebrations, making them popular for sweetly showing patriotism.
Why You’ll Love Patriotic Cake Pops
Patriotic cake pops are more than just a tasty treat. Here’s why they stand out and why you’ll love them:
Eye-Catching and Fun
These cake pops are bright red, white, and blue. They look great at any celebration and, with their fun design, make parties more exciting and memorable.
Easy to Eat
Cake pops are small and come on sticks. They can be eaten without making a mess, making them perfect for kids and adults alike.
Made to Share
These treats are great for sharing with friends, family, or coworkers. They bring people together and spread joy.
Ingredients for Patriotic Cake Pops
- Cake mix: Choose a simple boxed cake mix. It makes the base easy to prepare and keeps the flavor light and fluffy.
- Vanilla frosting: Use creamy vanilla frosting to bind the crumbled cake. It adds moisture and helps the cake pops hold their shape.
- Candy melts: Candy melts, which come in red, white, and blue, coat the cake pops, giving them a smooth and festive finish.
- Sprinkles: Add colorful sprinkles for extra decoration. Red, white, and blue sprinkles make the cake pops look patriotic and fun.
- Pop sticks: Pop sticks hold the cake pops and make them easy to eat. Choose sturdy sticks to keep the treats from falling apart.
How to Make Patriotic Cake Pops
Ingredients
To make patriotic cake pops, you will need:
- 1 box of white or yellow cake mix (plus ingredients called for on the box)
- 1 cup of vanilla frosting
- Red, white, and blue candy melts or white chocolate with food coloring
- Sprinkles in red, white, and blue (optional)
- Cake pop sticks
Directions
- Bake the cake: Prepare the cake mix as directed on the box. Bake and cool completely.
- Crumble the cake: Break the cake into fine crumbs using your hands or a food processor.
- Mix with frosting: Add vanilla frosting to the crumbs until the mixture holds together but isn’t too sticky.
- Form cake balls: Roll the mixture into 1-inch balls and place on a baking sheet lined with parchment paper.
- Chill: Refrigerate the balls for at least 1 hour to firm up.
- Prepare candy melts: Melt red, white, and blue in separate bowls according to package instructions.
- Insert sticks: Dip the tip of each cake pop stick into melted candy, then insert into each cake ball to secure.
- Dip cake pops: Dip each cake pop into melted candy melts, covering them completely. Let excess drip off.
- Decorate: Add sprinkles or designs while the coating is still wet.
- Dry: Stick the pops upright in a Styrofoam block until the coating hardens.
Patriotic Cake Pops Variation
You can create different versions of patriotic cake pops to match your taste and creativity:
- Classic Red, White, and Blue: Use vanilla cake with melts of red, white, and blue candy. Decorate with matching sprinkles.
- Chocolate Delight: Use chocolate cake with a white coating and add red and blue stripes using colored icing.
- Berry Blast: Use strawberry or blueberry cake in natural red and blue colors and top it with white chocolate drizzle.
- Flag Design: Create small American flags on the pops with icing or edible markers for a more detailed look.
How to Serve Patriotic Cake Pops
Serving patriotic cake pops is simple and adds fun to your event:
- Arrange them in a tall glass or jar with colored tissue paper or decorative beads to hold them upright.
- Place them on a cake pop stand for a neat, festive display.
- Bundle them in small clear bags tied with red, white, and blue ribbons as party favors.
- To create a themed dessert table, serve them alongside other patriotic desserts like cupcakes or cookies.
Storage Tips
To keep your patriotic cake pops fresh and tasty, follow these storage tips:
- If you plan to eat them within 1-2 days, store them in an airtight container at room temperature.
- Please place them in the refrigerator for up to one week for extended storage. Let them come to room temperature before serving for the best taste.
- Avoid storing them in humid places, as the candy coating might become sticky.
- If you want to keep them longer, you can freeze cake pops for up to a month. Wrap them well in plastic wrap and place them in a freezer-safe container. Thaw in the fridge before serving.
FAQs About Patriotic Cake Pops
How do you make patriotic cake pops?
You start by baking a cake, crumbling it, and mixing it with frosting to form balls. Then, dip them in colored chocolate or candy melts to match patriotic themes.
Can I customize patriotic cake pops for different events?
You can change colors and decorations to fit different holidays or celebrations. For example, red, white, and blue work well for U.S. events.
Are patriotic cake pops suitable for kids?
Absolutely! They are bite-sized, fun to eat, and perfect for kids’ parties. Plus, the bright colors make them extra appealing.
Where can I buy patriotic cake pops?
You can find them at local bakeries or online stores or make them yourself at home. Ordering ahead is a good idea, especially around big holidays.
Patriotic Cake Pops Recipe
Equipment
- Mixing Bowls
- Electric mixer or hand whisk
- Cake pop sticks
- Baking sheet or tray
- Parchment paper or silicone mat
- Microwave-safe bowls
- Spoons or spatulas
- Styrofoam block or cake pop stand
- Measuring Cups and Spoons
Ingredients
- 1 box of white or yellow cake mix
- 1 cup of vanilla frosting
- Red, white, and blue candy melts or white chocolate with food coloring
- Sprinkles in red, white, and blue (optional)
- Cake pop sticks
Instructions
- Bake the cake: Prepare the cake mix as directed on the box. Bake and cool completely.
- Crumble the cake: Break the cake into fine crumbs using your hands or a food processor.
- Mix with frosting: Add vanilla frosting to the crumbs, mixing until the mixture holds together but isn’t too sticky.
- Form cake balls: Roll the mixture into 1-inch balls and place on a baking sheet lined with parchment paper.
- Chill: Refrigerate the balls for at least 1 hour to firm up.
- Prepare candy melts: Melt red, white, and blue candy melts in separate bowls according to package instructions.
- Insert sticks: Dip the tip of each cake pop stick into melted candy, then insert into each cake ball to secure.
- Dip cake pops: Dip each cake pop into melted candy melts, covering completely. Let excess drip off.
- Decorate: Add sprinkles or designs while the coating is still wet.
- Dry: Stick the pops upright in a Styrofoam block until the coating hardens.